
Improving Shapes After Tooth Whitening
The approach here started with the simplest, most conservative option: four weeks of home whitening to lift the shade evenly across the smile — non-invasive, straightforward, and inexpensive compared to anything restorative. Only once that new, brighter shade was settled did minimal edge bonding follow, applied selectively to just the teeth that needed it to correct symmetry and shape, without covering full tooth surfaces. Most of each tooth kept its own healthy, stable enamel — bonding added only where it was actually needed.
The order matters, and it's often got backwards: composite resin doesn't respond to bleaching the way natural enamel does, so whitening always comes first. Once the teeth have reached the shade you're happy with, the composite is colour-matched to that final result — not the other way around, which would leave the bonding a shade behind everything whitening had already lightened.
Shared with patient consent. Results are individual to this patient.
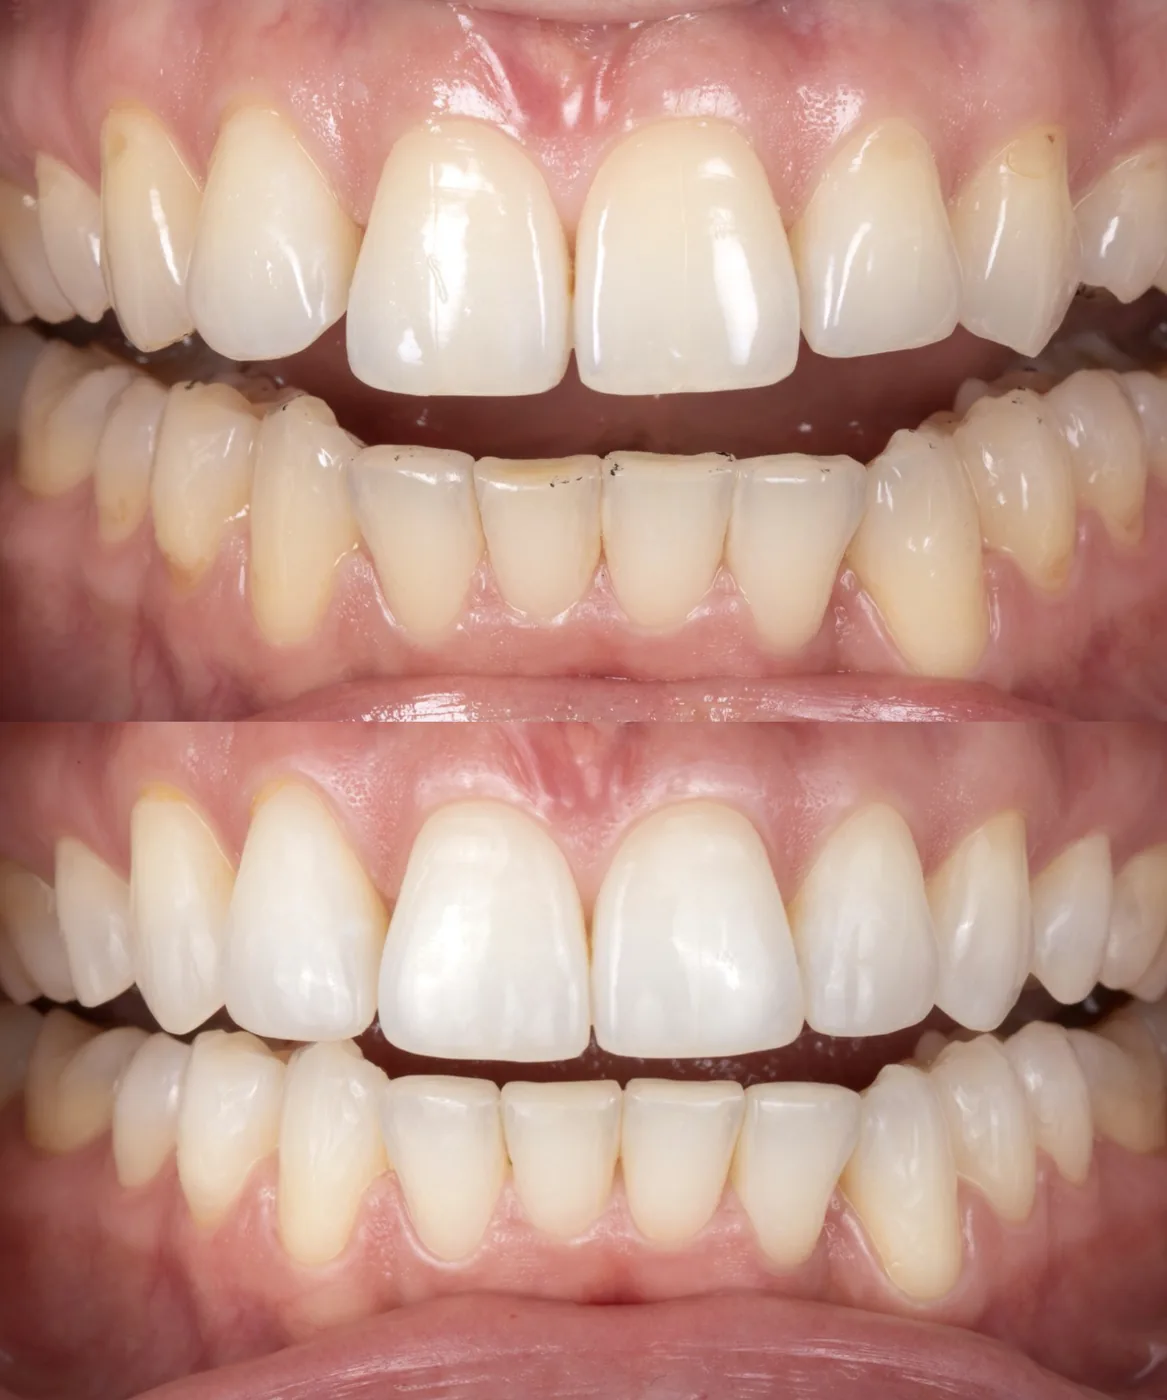
Clinical photos
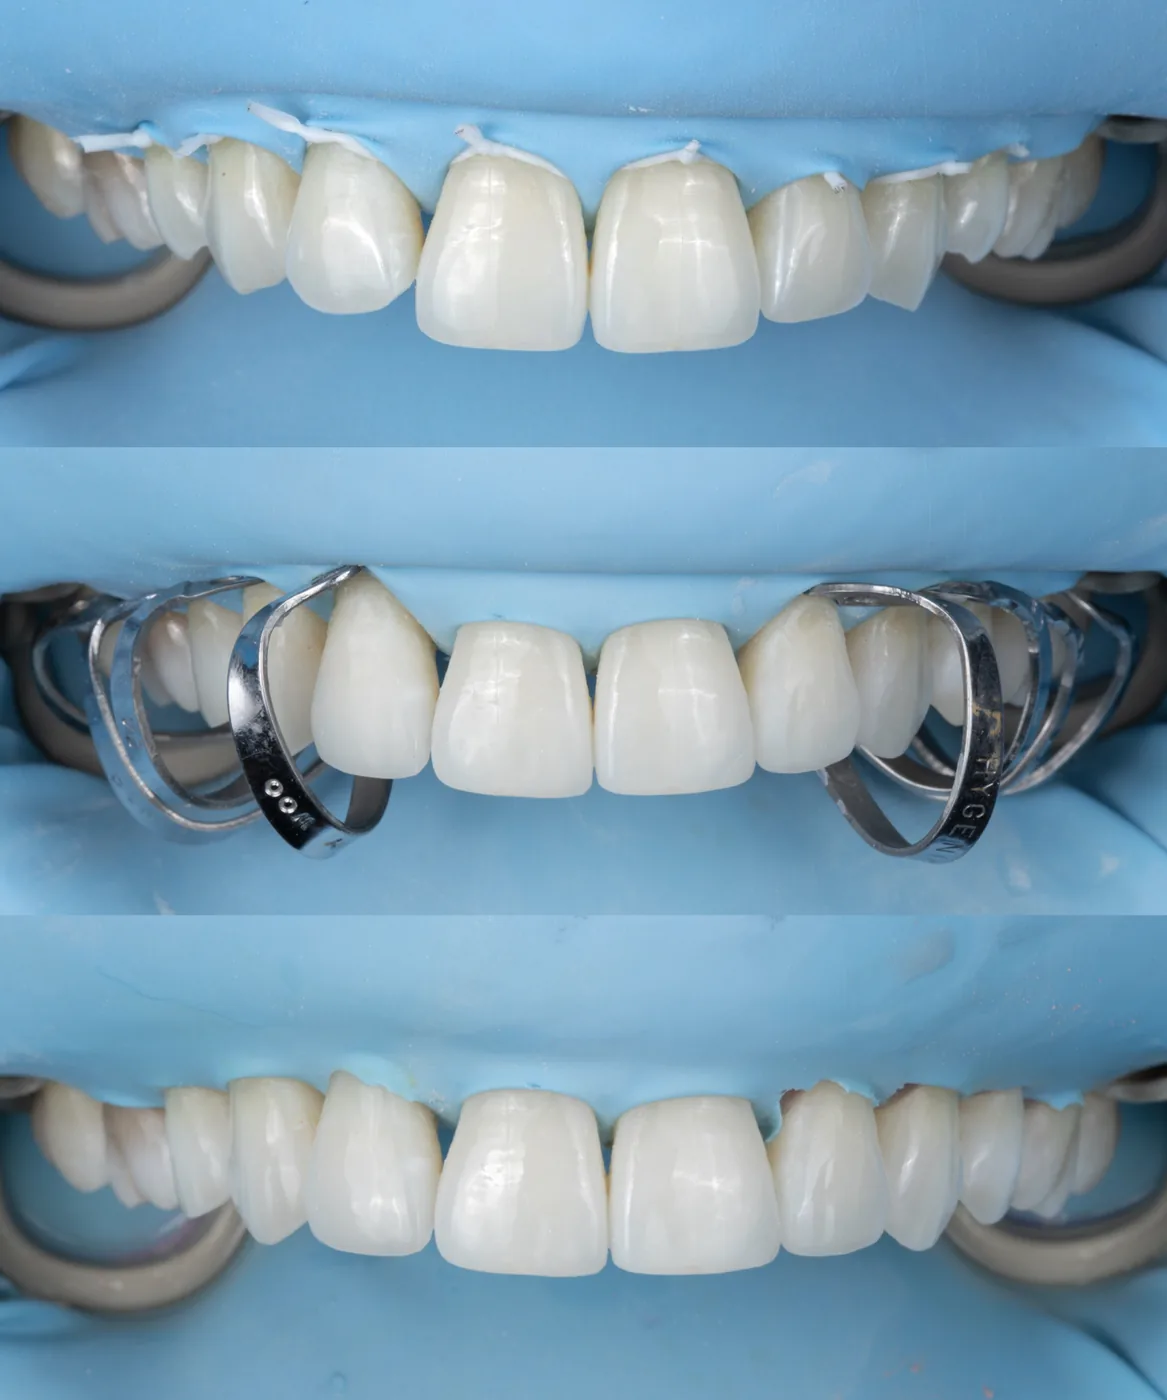
Under rubber dam — matrices in place while composite is layered and shaped 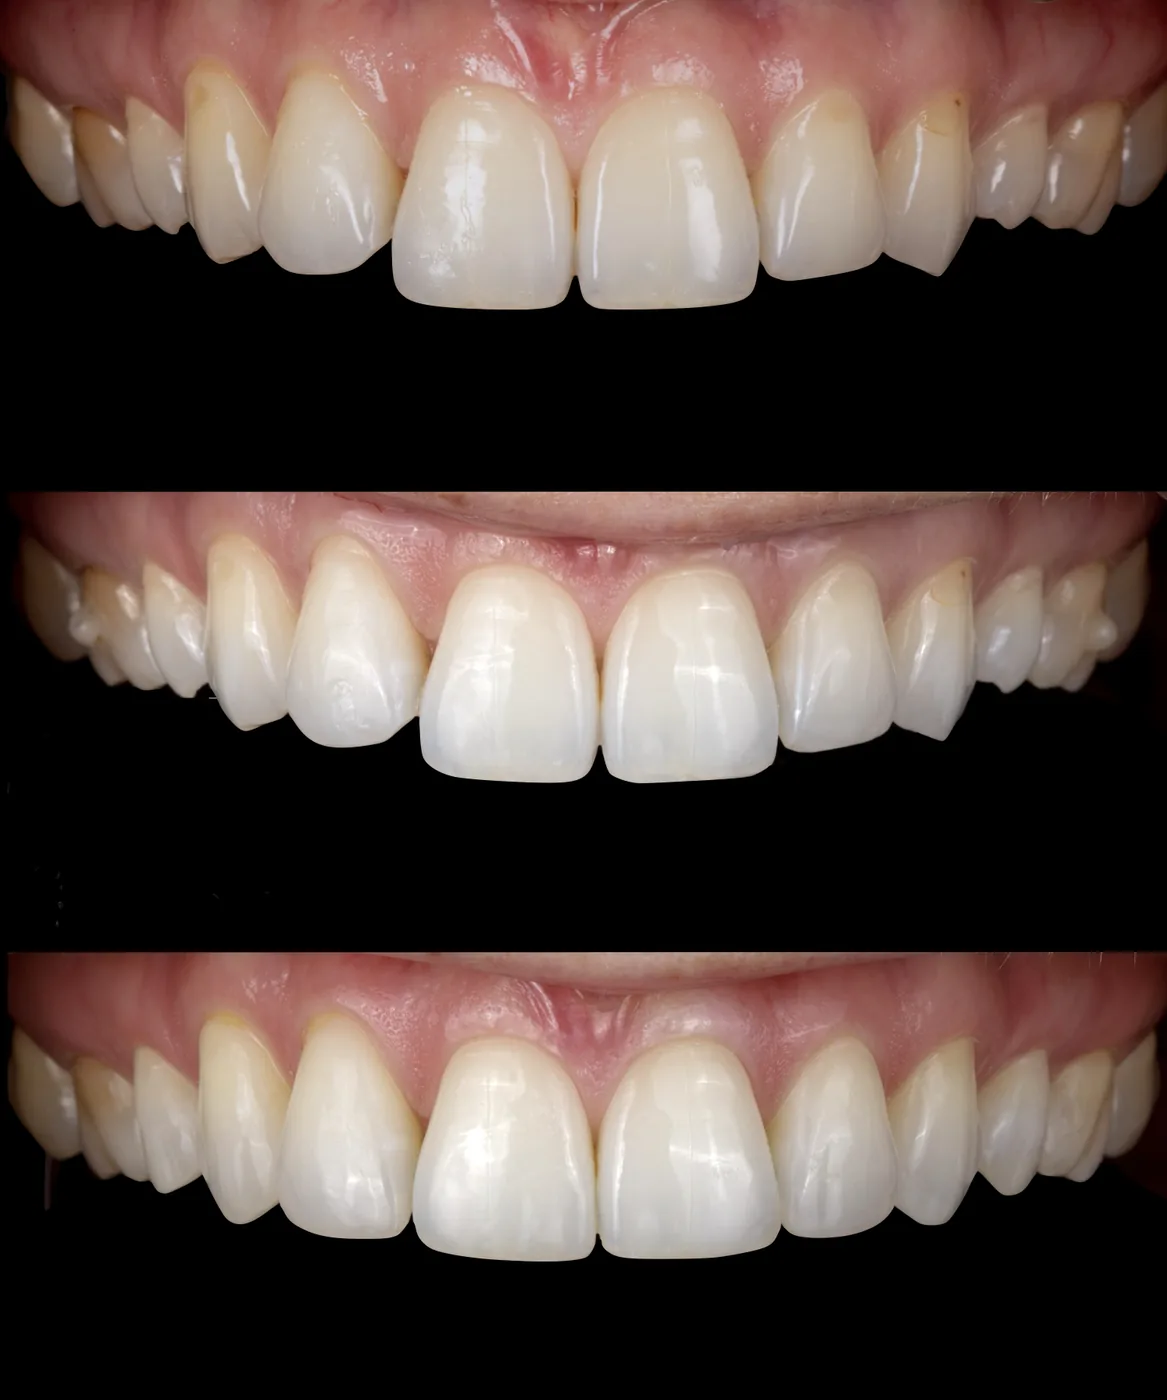
Close-up progression — edge length and width refined step by step 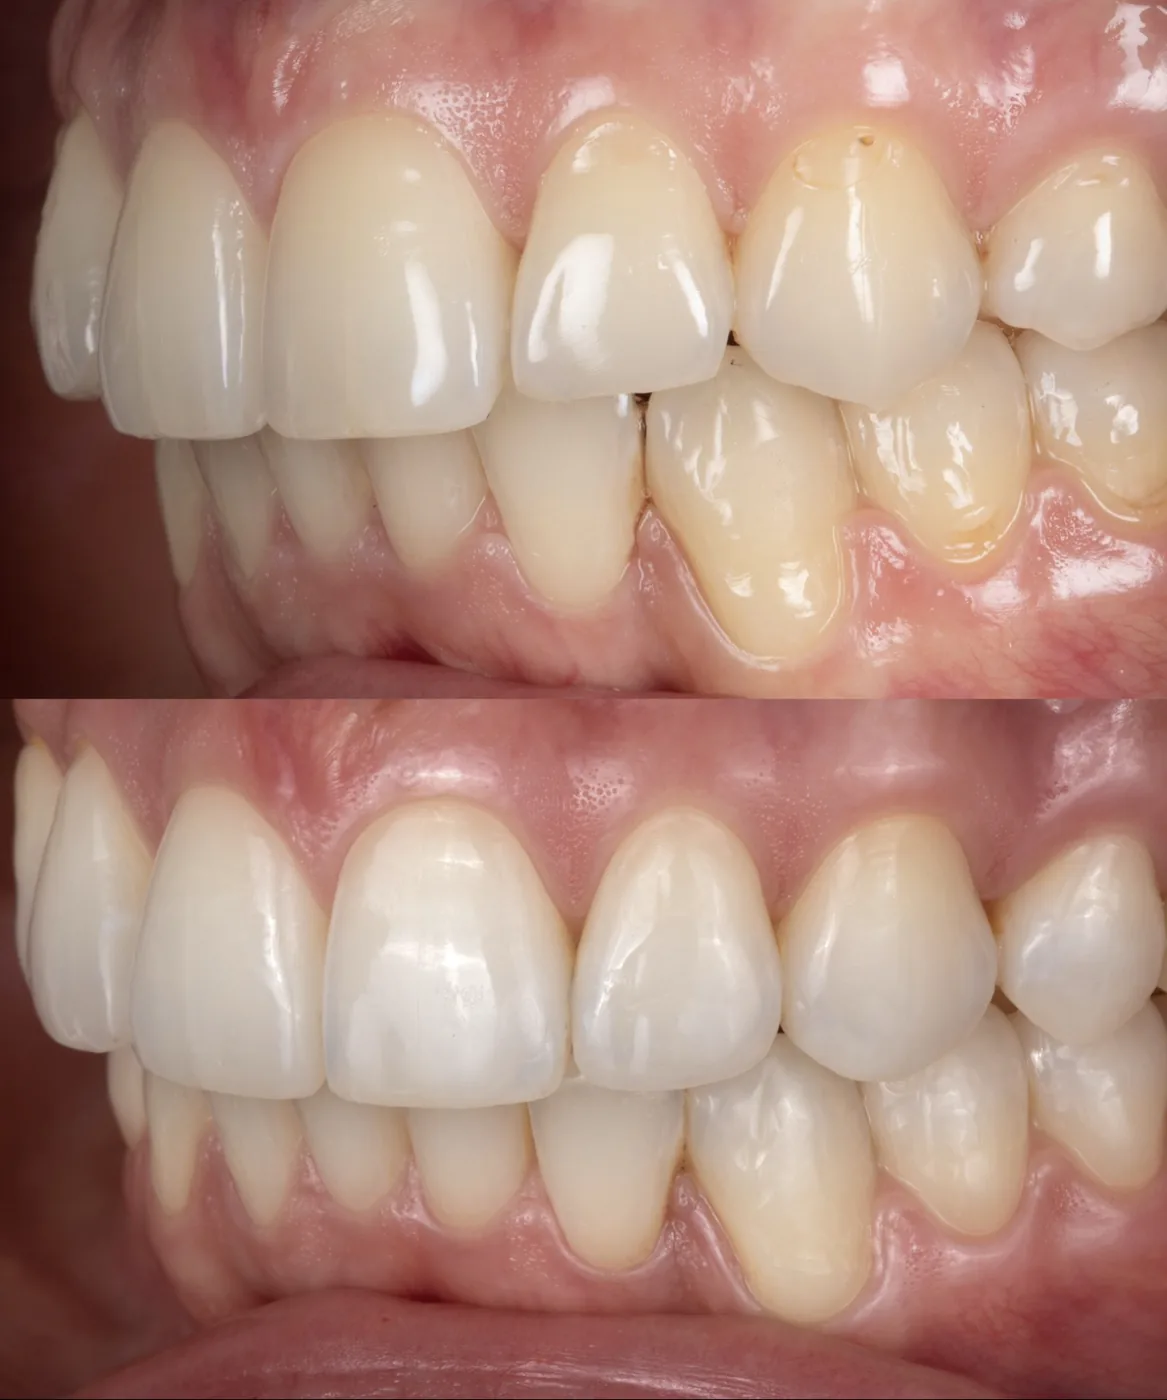
Side views — final contours polished and blended with the whitened shade - Back to Composite Bonding
Not sure where you fit?
You don’t have to know which treatment you need — that’s exactly what a consultation or Ask About Your Smile is for.
Treatments in this case
Not sure where you fit?
You don’t have to know which treatment you need — that’s exactly what a consultation or Ask About Your Smile is for.